Captcha Hacking(3) - Data Cleaning
Cleaning Data for Captcha Hacking (3)
Captcha Hacking Series
Captcha Hacking(1) - Defining the Problem
Captcha Hacking(2) - Collecting Data and Analyzing
Captcha Hacking(3) - Data Cleaning
Captcha Hacking(4) - Training with KNN Algorithm
Captcha Hacking(5) - Automating to solve the Captcha problem
Topic
Getting Numbers with Color
Using the information that we talked about previously, we can use this information to get some numbers.
For example if we filter just the green characters using image below, then we will only see 5 8 4 5 from the image 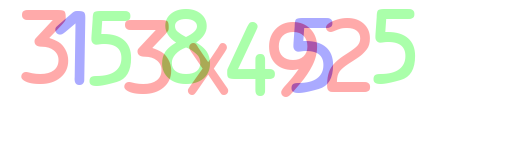
utils.py
1
2
3
4
5
6
7
8
9
10
11
12
13
14
15
16
17
18
19
20
21
22
23
24
BLUE = 0
GREEN = 1
RED = 2

# turn the characters that have our image into WHITE and others into BLACK
def get_chars(image, color):
    other_1 = (color + 1) % 3
    other_2 = (color + 2) % 3

    # turn the other colors into BLACK
    c = image[:, :, other_1] == 255
    image[c] = [0, 0, 0]
    c = image[:, :, other_2] == 255
    image[c] = [0, 0, 0]

    # if our color is less than AA in hexcode, turn into BLACK
    c = image[:, :, color] < 170
    image[c] = [0, 0, 0]

    # turn our color into WHITE
    c = image[:, :, color] != 0
    image[c] = [255, 255, 255]

    return image
test.py
1
2
3
4
5
6
7
8
9
10
11
12
13
14
import cv2
import utils

image = cv2.imread('1.png', cv2.IMREAD_COLOR)
blue = utils.get_chars(image.copy(), utils.BLUE)
green = utils.get_chars(image.copy(), utils.GREEN)
red = utils.get_chars(image.copy(), utils.RED)

cv2.imshow('Image Gray(BLUE)', blue)
cv2.waitKey(0)
cv2.imshow('Image Gray(GREEN)', green)
cv2.waitKey(0)
cv2.imshow('Image Gray(RED)', red)
cv2.waitKey(0)
Output:
| Original Image | BLUE | GREEN | RED |
| 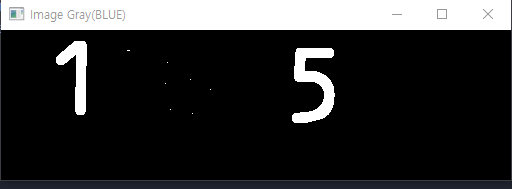 | 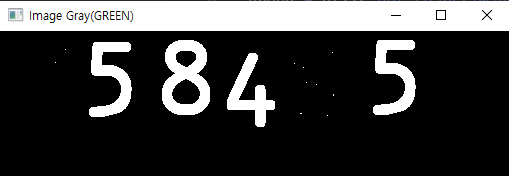 | 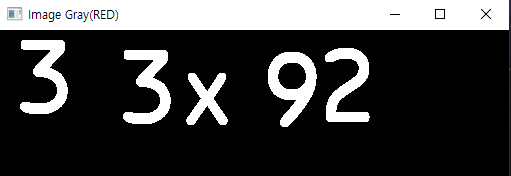 |
Extracting Characters
We want to now first extract the characters: From the left to right, extract the characters from the image
utils.py
1
2
3
4
5
6
7
8
9
10
11
12
13
14
15
16
17
18
19
20
21
22
23
24
25
26
import cv2

# extract the characters from the image
def extract_chars(image):
    chars = []
    colors = [BLUE, GREEN, RED]
    for color in colors:
        image_from_one_color = get_chars(image.copy(), color)
        # change the image to gray to apply thresholding
        image_gray = cv2.cvtColor(image_from_one_color, cv2.COLOR_BGR2GRAY)
        ret, thresh = cv2.threshold(image_gray, 127, 255, 0)
        # find contours
        contours, _ = cv2.findContours(thresh, cv2.RETR_EXTERNAL, cv2.CHAIN_APPROX_SIMPLE)

        for contour in contours:
            # if image size is bigger than 50, we should extract them
            area = cv2.contourArea(contour)
            if area > 50:
                x, y, width, height = cv2.boundingRect(contour)
                # getting roi using boundingRect
                roi = image_gray[y:y + height, x:x + width]
                chars.append((x, roi))

        # sort the array by x value so it reads from left to right
        chars = sorted(chars, key=lambda char: char[0])
    return chars
We want to now scale the extracted iamges into same size (20x20)
utils.py
1
2
3
4
5
6
7
import numpy as np

# make specific image into (20x20) size
def resize20(image):
    resized = cv2.resize(image, (20, 20))
    # turn it into 1D vector for KNN
    return resized.reshape(-1, 400).astype(np.float32)
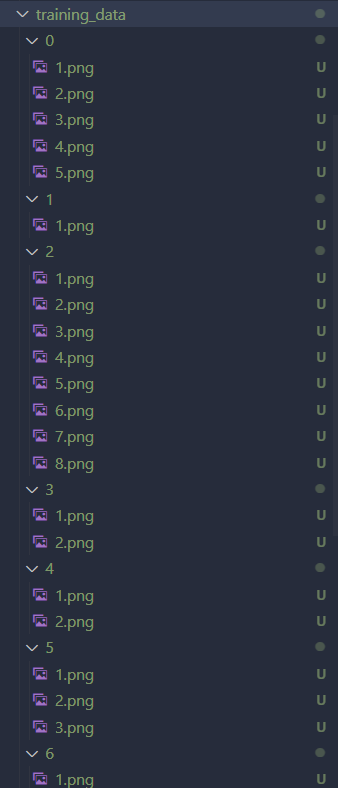
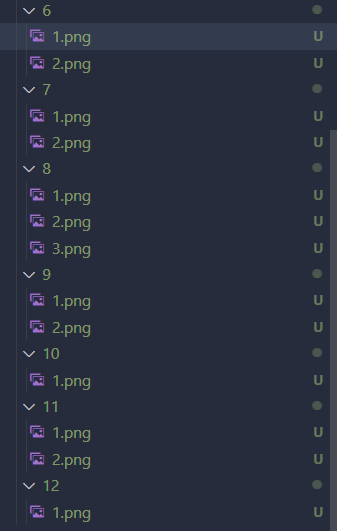
Creating Training Data
We want to now make a training data
First create a folder called training_data, and inside have folders 0, 1, 2, 3, 4, 5, 6, 7, 8, 9, 10, 11, 12 where each number represents their label for the image. (10 = ‘+’, 11 = ‘-‘, 12 = ‘*’)
make_train_data.py
1
2
3
4
5
6
7
8
9
10
11
12
13
14
15
16
17
18
19
20
21
22
23
24
25
26
27
28
import os
import cv2
import utils

# in training_data folder and inside 0, 1, 2, 3, 4, 5, 6, 7, 8, 9, 10, 11, 12 folders label the images and save them in correct place
# other numbers are saved as they are in folder and 10 = '+', 11 = '-', 12 = '*'

image = cv2.imread('1.png')
# extract the characters
chars = utils.extract_chars(image)

for char in chars:
    # show the image
    cv2.imshow('Image', char[1])
    input = cv2.waitKey(0)
    # resize the image to 20 x 20
    resized = cv2.resize(char[1], (20,20))

    # label the image from 0 to 9 by inputing number 0 to 9 and save them
    if input >= 48 and input <= 57:
        name = str(input - 48)
        file_count = len(next(os.walk('./training_data/' + name + '/'))[2])
        cv2.imwrite('./training_data/' + str(input - 48) + '/' + str(file_count + 1) + '.png', resized)
    # label operation characters 'a' = +, 'b' = -, 'c' = * and save them
    elif input == ord('a') or input == ord('b') or input == ord('c'):
        name = str(input - ord('a') + 10)
        file_count = len(next(os.walk('./training_data/' + name + '/'))[2])
        cv2.imwrite('./training_data/' + name + '/' + str(file_count + 1) + '.png', resized)
Once you run the make_training_data.py file with all the images that we saved, we should have all the data for each possible characters like below and you can click on each images and see that they’re resized as well
| Result(1) | Result(2) | Resized Image |
 |  |  |